Setting up a Raspberry Pi NAT router can significantly enhance your networking capabilities at home or in the office. If you're looking for an affordable and efficient way to manage your network, this guide will walk you through every step of the process. Whether you're a beginner or an advanced user, Raspberry Pi offers a versatile platform to create your own NAT router.
As technology advances, the need for customized and cost-effective networking solutions becomes more apparent. A Raspberry Pi NAT router setup allows you to take control of your network traffic, manage internet access, and even improve security. This guide will provide you with all the necessary information to get started, including the required hardware, software configuration, and troubleshooting tips.
By the end of this article, you'll have a clear understanding of how to transform your Raspberry Pi into a fully functional NAT router. We'll cover everything from the basics of NAT routing to advanced configurations, ensuring that you can customize your setup to meet your specific needs. Let's dive in!
- Megyn Kellys Weight Journey Insights Achievements And More
- Unveiling The Remarkable Journey Of Jill Kenmont An Inspiring Story
Table of Contents
- Introduction to Raspberry Pi NAT Router
- Required Hardware for Raspberry Pi NAT Router Setup
- Software and Operating Systems
- Installation Process
- Configuring the Raspberry Pi NAT Router
- Setting Up the Network
- Enhancing Security
- Troubleshooting Common Issues
- Improving Performance
- Conclusion and Next Steps
Introduction to Raspberry Pi NAT Router
A Raspberry Pi NAT router is a powerful solution for managing your network traffic. NAT (Network Address Translation) is a protocol that allows multiple devices on a private network to share a single public IP address. By using a Raspberry Pi as a NAT router, you can control how devices connect to the internet and optimize your network performance.
One of the main advantages of using Raspberry Pi for this purpose is its affordability and flexibility. Unlike traditional routers, Raspberry Pi allows you to customize your setup according to your needs. Whether you're looking to create a guest network, monitor bandwidth usage, or implement advanced security features, Raspberry Pi provides the tools you need.
Why Choose Raspberry Pi?
Raspberry Pi stands out as a versatile platform for networking projects due to its:
- Unveiling The Life Of Karoline Leavitt And Her Husband Jeffrey Miller A Comprehensive Guide
- Unveiling The Potential Of Hb Hub 4ucom Your Ultimate Online Resource
- Low cost
- Compact size
- Wide range of supported software
- Active community support
These features make it an ideal choice for both hobbyists and professionals who want to experiment with networking solutions.
Required Hardware for Raspberry Pi NAT Router Setup
Before diving into the setup process, you'll need to gather the necessary hardware components. Here's a list of items you'll need to get started:
- Raspberry Pi (preferably Raspberry Pi 4 for better performance)
- MicroSD card with at least 16GB capacity
- Power supply for Raspberry Pi
- Ethernet cables
- USB Wi-Fi adapter (optional, for wireless connectivity)
- Keyboard and monitor (or use SSH for remote access)
Choosing the Right Raspberry Pi Model
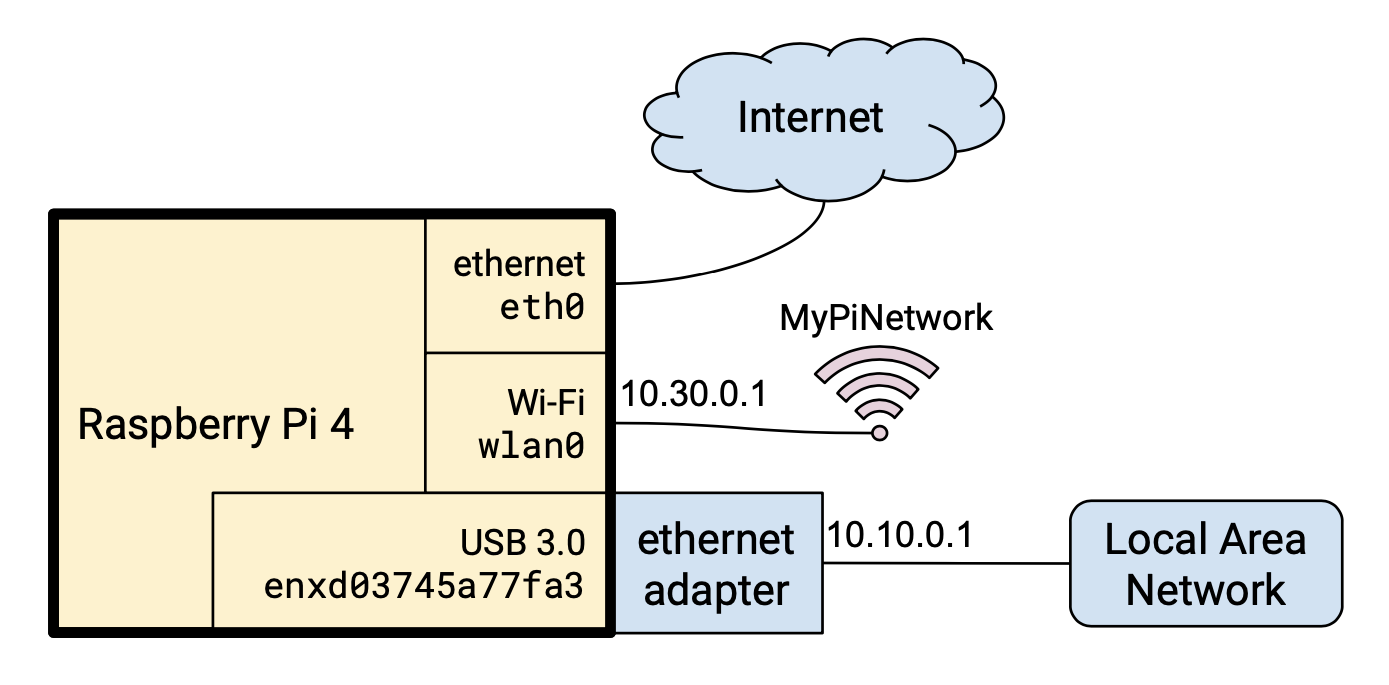
While older models like Raspberry Pi 3 can work, Raspberry Pi 4 is highly recommended due to its improved processing power and dual Ethernet ports. This makes it easier to configure separate LAN and WAN connections without needing additional hardware.
Software and Operating Systems
Selecting the right operating system is crucial for setting up a Raspberry Pi NAT router. While there are several options available, Raspbian (now called Raspberry Pi OS) is the most popular choice due to its stability and wide range of support.
Alternative Operating Systems
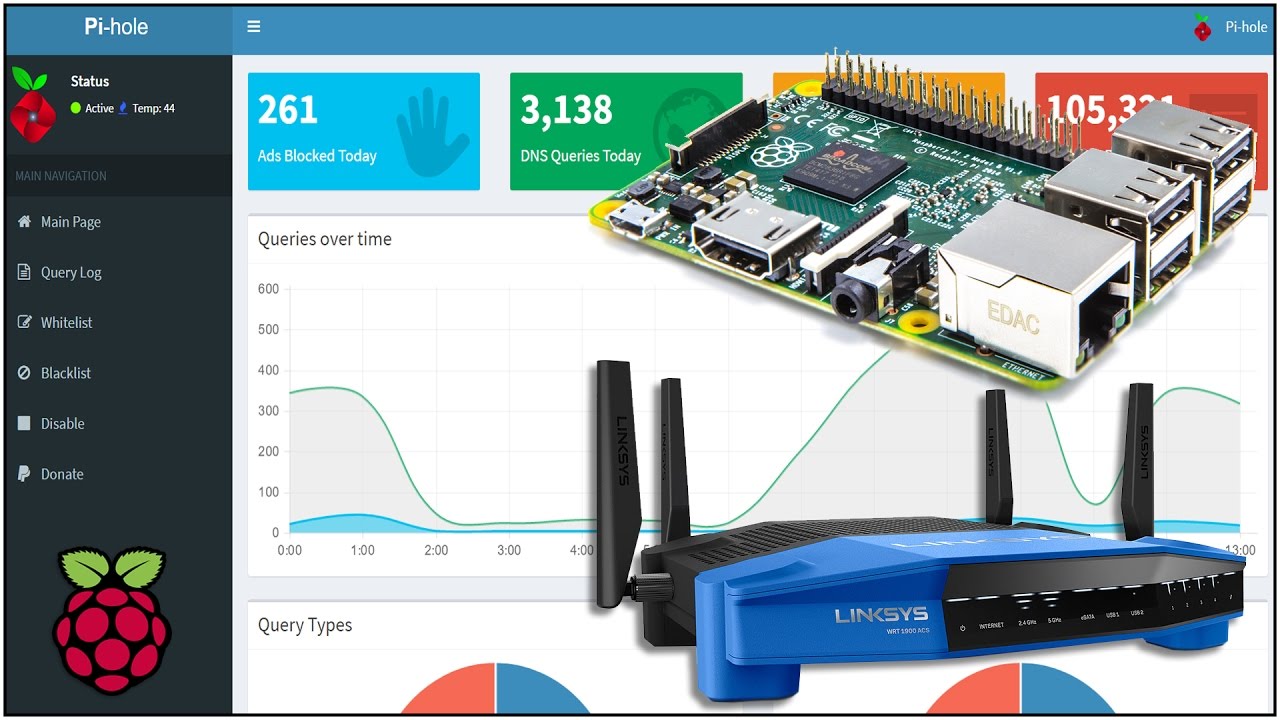
For more advanced users, other operating systems such as OpenWrt or Pi-hole can be considered. These systems are specifically designed for networking and DNS filtering, providing additional features and flexibility.
Installation Process
The installation process involves preparing your Raspberry Pi and setting up the operating system. Follow these steps:
- Download Raspberry Pi OS from the official website.
- Use a tool like BalenaEtcher to flash the OS onto your MicroSD card.
- Insert the MicroSD card into your Raspberry Pi and power it on.
- Connect to your Raspberry Pi using SSH or directly via a monitor and keyboard.
Once the installation is complete, you can proceed to configure your NAT router.
Configuring the Raspberry Pi NAT Router
Configuring your Raspberry Pi as a NAT router involves several steps. Here's a detailed guide:
Step 1: Enable IP Forwarding
IP forwarding allows your Raspberry Pi to forward packets between networks. To enable it, edit the sysctl configuration file:
Run the following command:
sudo nano /etc/sysctl.conf
Uncomment the line:
net.ipv4.ip_forward=1
Step 2: Set Up NAT Rules
Use iptables to set up NAT rules. For example:
sudo iptables -t nat -A POSTROUTING -o eth0 -j MASQUERADE
This command configures the Raspberry Pi to masquerade outgoing traffic from the LAN interface to the WAN interface.
Setting Up the Network
Proper network configuration is essential for your Raspberry Pi NAT router to function correctly. Here's how to set it up:
Assign Static IP Addresses
Assign static IP addresses to your Raspberry Pi interfaces. For example:
- eth0: WAN interface (e.g., 192.168.1.100)
- eth1: LAN interface (e.g., 192.168.2.1)
Edit the dhcpcd configuration file:
sudo nano /etc/dhcpcd.conf
Add the following lines:
interface eth1
static ip_address=192.168.2.1/24
Enhancing Security
Security is a critical aspect of any network setup. Here are some tips to enhance the security of your Raspberry Pi NAT router:
- Change the default SSH password.
- Disable password-based SSH login and use SSH keys instead.
- Install a firewall using tools like ufw (Uncomplicated Firewall).
Installing a Firewall
To install ufw, run:
sudo apt install ufw
Enable the firewall with:
sudo ufw enable
Troubleshooting Common Issues
Even with careful setup, issues may arise. Here are some common problems and their solutions:
- No internet connectivity: Check your Ethernet cables and ensure that IP forwarding is enabled.
- Slow performance: Optimize your Raspberry Pi's configuration and ensure that it has sufficient power.
- SSH connection issues: Verify that the SSH service is running and that your firewall rules allow SSH traffic.
Improving Performance
To get the most out of your Raspberry Pi NAT router, consider these performance tips:
- Use a high-quality power supply to prevent voltage drops.
- Optimize your network settings for faster data transfer.
- Regularly update your operating system and software to ensure compatibility and security.
Conclusion and Next Steps
In conclusion, setting up a Raspberry Pi NAT router is a rewarding project that offers numerous benefits for your network. By following the steps outlined in this guide, you can create a customized and efficient solution tailored to your needs. Remember to regularly update your setup and explore advanced configurations to further enhance your router's capabilities.
We encourage you to share your experience in the comments below or explore other articles on our website for more networking tips and tutorials. Happy tinkering!
- Exploring The Risks And Alternatives To 5 Movierulz Download
- Will Arnetts Financial Empire Understanding The Stars Net Worth And Success